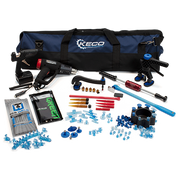
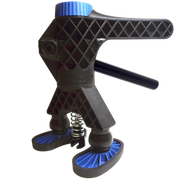
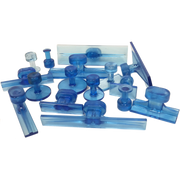
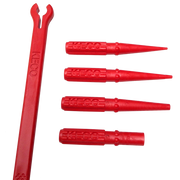
In this video, Gene is showcasing the Keco Crease Killer setup with dual Robo Lifter heads and the 7mm Dead Center crease tab.
The damage in this video is the driver's rear door of a 2014 Audi A4. The dent is a sharp narrow crease that is about 7” long and extends from the leading edge of the door straight back into the body of the panel.
The reason that Gene chose to go with a GPR approach to start this crease was that the damage was pretty sharp with a very defined bottom. Although he could have tooled the dent out using only PDR tools, he felt that with the ability of the Crease Killer setup to move such tight creases so quickly and cleanly that he would be able to make a faster cleaner repair. The total number of pulls was 5 to get the damage to an easily repairable level with his PDR tools, and certainly, at this point it would have been ready for a conventional collision shop repair. A lot of the affected area would have been blocked out and the remaining area wouldn’t have needed anything more than a light coat of glaze.
The approach he took was a full tab of glue and started at the right-hand side of the dent. This area was in the open and slightly shallower than the left. When using crease tabs, especially the crease killer tabs he likes to mark the edges of the damage so that tab alignment is as perfect as possible. Making a misplaced pull with these tabs can create a lot of extra work by pulling the side of the crease in onto itself.
Gene made multiple pulls instead of one or two aggressive pulls to try and minimize over pulling the area and he used a knockdown to keep everything in check after each pull. The Crease Killer Dead Center tab, when used with the Crease Killer feet, will allow you to pull sharp crease lines back out of the metal. As the crease pulled up he concentrated his tapping down on either side of the deepest part, (a cross-section of the crease would look like a volcano when it’s pulled up and he knocks the edges of the volcano down to keep things moving)
As Gene worked the damage right to left, he came up against the damage going to the edge of the panel where there was a small chip in the paint. (His client did not want to have his vehicle painted and was going to touch up the chip.) Gene pulled as close to the edge as he could while minimizing the risks for additional paint damage from the chipped area. He finished the entire crease off with traditional PDR tools but the main area he had to work was the left side of the dent. If this was a repair for a body shop or if there was not a chip in the paint, he would have made a couple more, increasingly aggressive pulls on the left side but erred on the side of caution for this particular paintless approach.
His elapsed time was about 20 minutes glue pulling and an additional 10-15 minutes with tools to finish off this repair.
The weather conditions were perfect for glue pulling. Mid 70’s with low humidity. Gene used the green glue and prepped the panel with 3M compound and the cleaning & release solution. He did not have to heat the panel or flash any humidity off with a torch - a common technique to increase adhesion in the shop.


Leave a comment